

|
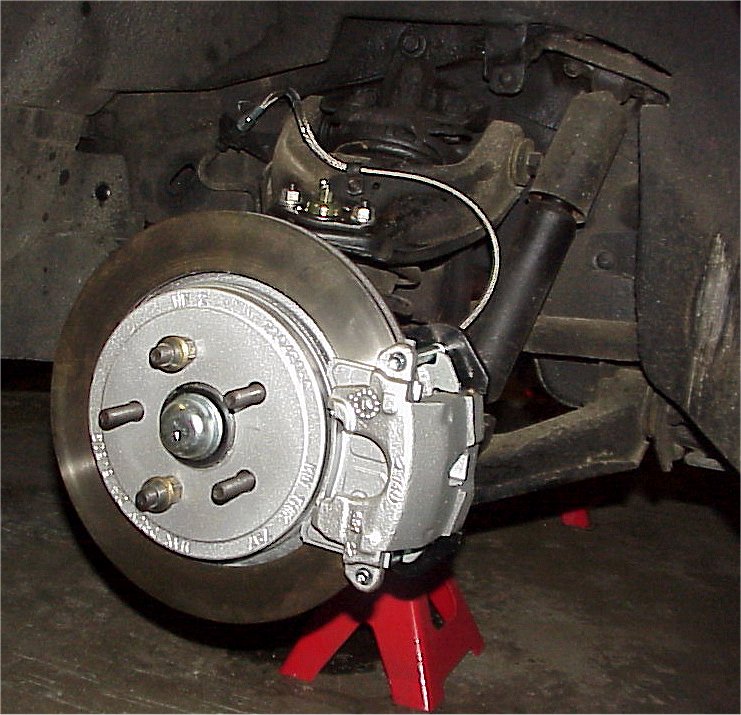
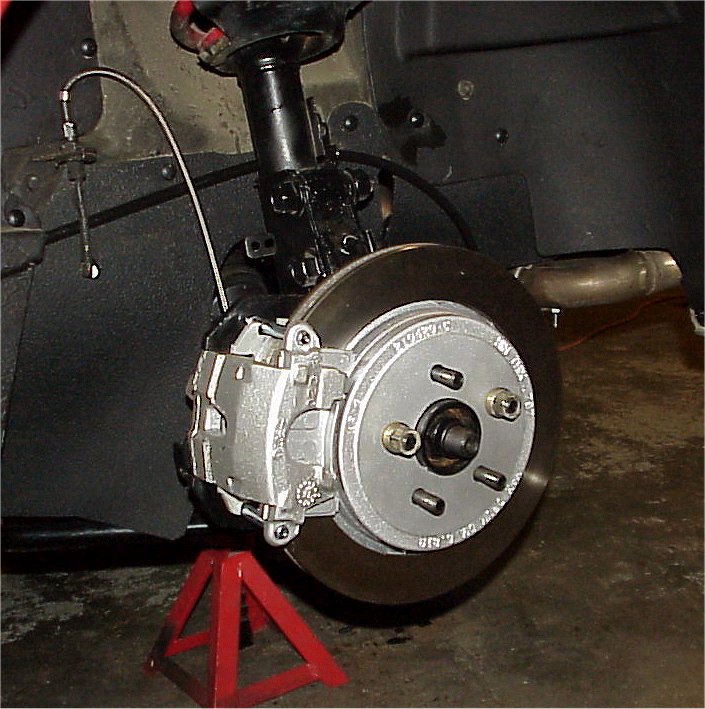
BIG Brakes Driving Lights Aftermarket Cooling Fan Radiator Vents The desire for better braking led me to upgrade the brakes following the Zettner Upgrade information . This upgrade utilizes the Chrysler LeBaron 11.25" rear rotors on all 4 wheels, and bigger calipers. I used the front and rear calipers from a 1979 Olds Toronado, with 2 sets of metallic pads (front and rear are same) plus a set of adaptor brackets and hubs.
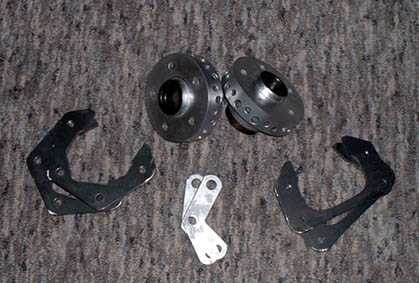
A kit was available that included the adaptor brackets etc. that greatly simplifies the swap. What was included: Whats needed to complete the swap, SS brake lines, Calipers and pads-front and rear, Correct caliper pins (2 per caliper), 4 LeBaron rotors (the rear rotors need to have the centering hole opened up .018") No longer available, but searching may find an alternative kit. <<
>>
BIG Brakes Driving Lights Aftermarket Cooling Fan Radiator Vents
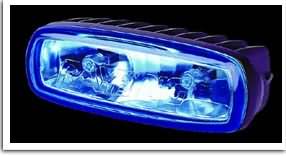
These lights are "twin lamp driving/fog lamps". What I did was dismantle the lamp, and replace the bulb in the smaller side with a 194 socket and amber bulb. I bought these lights at WalMart in Canada (Magnum X-treme Custom Dual PN# 20-335 / Superex Canada Ltd, Toronto, Ontario). In this picture, you can see that the outer side retains the halogen bulb, the inner half has the amber signal bulb installed. Similar to Hella Driving lights PN
HLA-H71010321 at
Summit Racing ------------------------------------------------------------------------------------------------------------------------------------------------------ Objective... To use in Fiero as signal/driving lights as I did... You need 2 90* angle boots to fit 194 style bulbs (available from NAPA) You'll need 2 amber signal bulbs with 194 style base. These are larger/brighter than regular 194 amber bulbs you'd use in the dash for example. I got these from a "Ricer" shop. You could also paint a pair of 921 bulbs. I also got a GM Parts 12370131 Daytime Running Light Control Module Kit. This can be set up to turn on the lights at half-voltage (daytime running light mode) automatically when the engine is running. These lights generate alot of heat in full-power. I have mine wired to come on in DLR mode (half-voltage) when park lights are on (otherwise off) They get full-power when driving with high beams on. ------------------------------------------------------------------------------------------------------------------------------------------------------ You will need to disassemble the lights. Remove the bulb from the smaller section on the twin-lamp and put away as a spare (same as other bulb). You will have to enlarge the opening slightly with a Dremel tool or similar to fit the amber signal light bulb through. You also have to work out how to fit the 194 base in there. I trimmed the rubber slightly so it just pushes in. Reassemble lights. Mounting in the car is another problem. After removing the factory signal light and the bracket behind it, I found I could fabricate a bracket to hold the lamps and attach it to the same mounting points. It takes time - not a 1/2 hour job, but the results are well worth it!! <<
>>
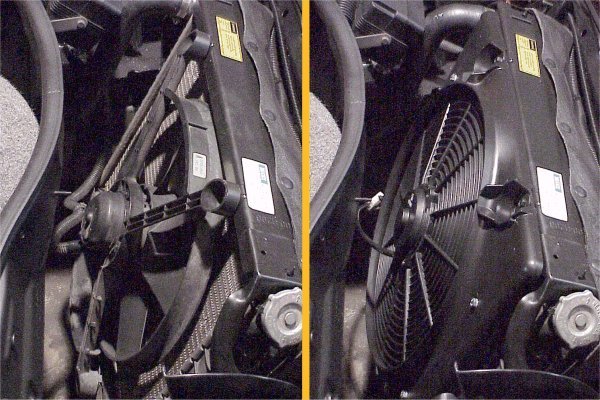
BIG Brakes Driving Lights Aftermarket Cooling Fan Radiator Vents I decided to upgrade the radiator cooling fan. As my car did not have a fan shroud, I got one from Bob at Kick Hill Parts ( http://www.kickhill.com/fiero.html ) for mounting the new fan. The shroud w/fan mounts the same and the original fan. I cut off the 4 arms that supported the fan and cleaned up the ends. I used a Proform Fan PN# 67016
I test-fit the position of the new fan and marked the location for the mounting bolts. I drilled the shroud and used bolts with washers (both sides) to fasten the fan to the shroud. The shroud then bolts back to the radiator supports using the original bolts and locations. The fan blades will pull forward when the
fan motor runs. It hot weather, it may deflect enough to hit in the
top and bottom edge of the radiator support. I found that I could
bend these slightly with a block of wood and hammer to prevent this
interference. It is not difficult, and only a slight bending is
required. It will not show once the fan and shroud are installed. <<
>>
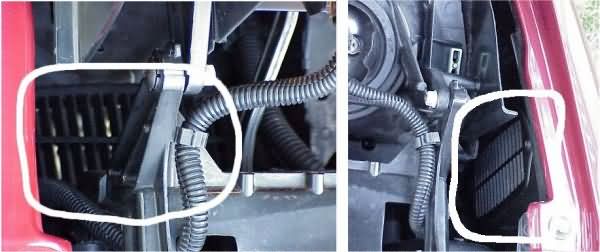
BIG Brakes Driving Lights Aftermarket Cooling Fan Radiator Vents The Fiero has a tendency to build up pressure in the radiator are under speed. The pressure can be great enough to push up the headlight doors and will even cause lift of the car's front end. There is a need to allow this air pressure to vent somewhere. There are several solutions. Most people install vents in the hood to allow the pressureized air to escape aid to air radiator cooling. I wanted a different solution that wouldn't require cuttting the hood, and would be stealth. I decided to cut openings to allow the air to escape out into the area in between the fender/wheelwell and trunk. The air then dissipates out the bottom and can even travel as far back as the gap between the fender and front door (it's open there too). I didn't want big ugly holes, so I got these vents from the junk yard from a Camaro(?). They are about 3"x5" rectangular vents that GMs use to allow passenger cabin air to vent for that "flow through ventilation". There're all different shapes and sizes, but these are larger than most, and a nice rectangular shape.
On the passenger side, I mounted it on the side vertically. I think this looks best. Unfortunately, you can't mount it this way on the driver's side becasue a headlamp motor relay box (?) is mounted there inside the fender. On the driver's side, I mounted it on the bottom below the headlamp to allow the air pressure to escape. There are already drain holes there to allow rain water to drain. You could mount the vents under headlamps on both sides. I tested these by driving about 90mph into
a 50mph headwind and they DID NOT pop up. <<
>> BIG Brakes Driving Lights
Aftermarket Cooling Fan
Radiator Vents |